Reverse Sear New York Strip In Oven
Let's be real for a sec. We all crave that restaurant-quality steak experience, right? The kind where the crust is chef's kiss and the inside is a perfectly rosy, juicy dream. But the reality for most of us is a slightly stressed-out kitchen dance, a prayer to the steak gods, and… well, sometimes a bit of a letdown. We've all been there, staring at a steak that's either a charcoal briquette or a pale, sad imitation of what we imagined.
But what if I told you there's a way to ditch the steak-induced anxiety and unlock that perfectly cooked magic, right in your own oven? No fancy equipment, no obscure techniques. Just you, your oven, and a beautiful New York strip steak. Enter the reverse sear. It’s not just a cooking method; it’s a lifestyle upgrade for your steak game.
The Magic of the Slow Burn: Why Reverse Sear Rules
Traditionally, we sear first, then finish in the oven (or grill). This often leads to a gradient of doneness: a well-done outer ring and a rare center. It’s a bit of a gamble, and if you're not a seasoned pro, the odds are often stacked against you. The reverse sear flips the script, literally.
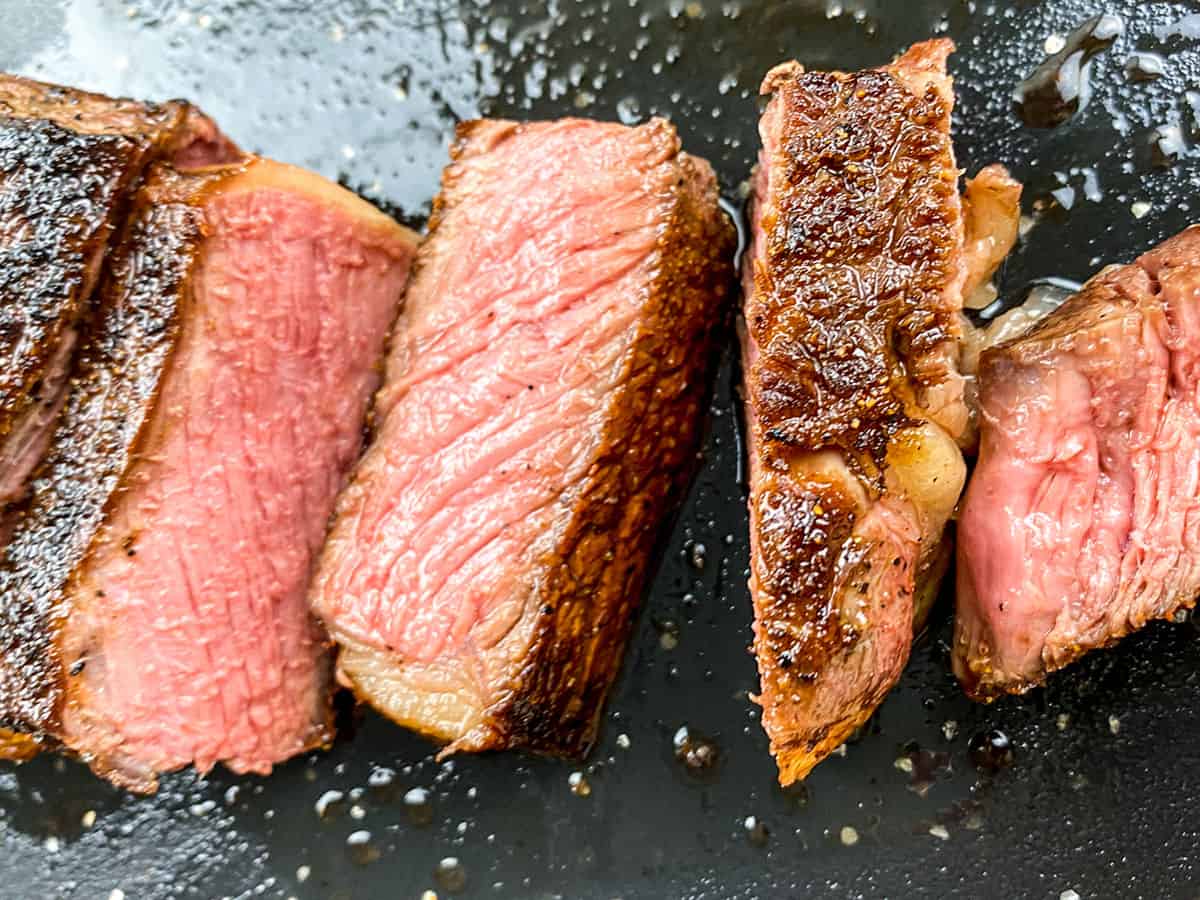
We start low and slow in the oven, gently bringing the steak up to temperature. This ensures an incredibly even cook from edge to edge. Think of it like a gentle spa treatment for your steak, preparing it for its grand finale. Once it reaches its ideal internal temperature, you give it a quick, aggressive sear. The result? A steak that's uniformly pink (or however you like it!), with a glorious, crispy, caramelized crust.
It’s almost ridiculously simple, but the results are nothing short of spectacular. It’s the kind of technique that makes you feel like you’ve stumbled upon a secret culinary society. And guess what? You have!
Why New York Strip? Your Steak Soulmate.
Now, let's talk about our star player: the New York strip. This cut is a classic for a reason. It’s got that perfect balance of marbling (those little flecks of fat that melt and add flavor and juiciness) and a firm, beefy texture. It's not as intensely marbled as a ribeye, which can sometimes get a little too rich for some, and it’s leaner than a filet mignon, meaning it holds up beautifully to a more aggressive sear without drying out.
The New York strip is the reliable friend of the steak world – always there to deliver, consistently delicious, and never trying too hard. It's the kind of steak that pairs perfectly with a glass of red wine, a simple salad, and good company. It's sophisticated without being stuffy. It's the denim jacket of steaks: effortlessly cool and always appropriate.
Gear Up: What You'll Need
Before we get our hands dirty (metaphorically, of course), let's talk about the essentials. Don't worry, this isn't a trip to a professional kitchen supply store. We're keeping it cozy and accessible.
- A Good New York Strip Steak: Aim for at least 1.5 inches thick. Thicker steaks benefit most from the reverse sear because they have more time to cook evenly before the sear. Look for good marbling. Your local butcher is your best friend here, but a good quality supermarket steak will also work.
- A Wire Rack and Baking Sheet: This is crucial for even air circulation during the low-and-slow oven phase. The steak shouldn't be sitting in its own juices.
- An Oven: Obviously. And a reliable one at that!
- A Cast-Iron Skillet (or heavy-bottomed pan): For that glorious sear. Cast iron is king here because it gets screaming hot and retains heat beautifully.
- Tongs: Essential for flipping.
- Meat Thermometer: This is your secret weapon. An instant-read digital thermometer is your best bet for accuracy and speed.
- Salt and Pepper: Keep it simple. Kosher salt and freshly cracked black pepper are all you need to let the steak shine.
- Optional Flavor Boosters: A clove of garlic, a sprig of rosemary or thyme, and a pat of butter for basting during the sear.
The Reverse Sear Symphony: Step-by-Step
Alright, let's get this steak party started. It’s more of a chill lounge vibe than a mosh pit, but the results will have you dancing.
Step 1: Prep Your Steak – The Zen Moment
Take your New York strip out of the fridge about 30-60 minutes before you plan to start cooking. This allows it to come to room temperature, which helps with even cooking. Don't skip this! It's like letting your favorite vinyl warm up before a DJ set.
Pat your steak thoroughly dry with paper towels. This is absolutely critical for developing that beautiful crust. Moisture is the enemy of a good sear. Imagine trying to get a tan on a rainy day – it’s just not going to happen. Get it bone dry!
Season generously with salt and freshly cracked black pepper. Don't be shy! The salt helps to draw out some of the moisture from the surface and contributes to the Maillard reaction, which is the scientific term for that magical browning and flavor development. Think of it as giving your steak its first layer of personality.
Step 2: The Gentle Oven Embrace
Preheat your oven to a low temperature, around 225-275°F (107-135°C). The lower the temp, the more even the cook, but it will take longer. We’re aiming for a gentle, persuasive rise in temperature, not a forceful shove.
Place your seasoned steak on the wire rack set inside a baking sheet. This setup allows air to circulate all around the steak, ensuring it cooks evenly and doesn't steam.
Now, pop it into the oven. This is where the patience comes in, but it’s a good kind of patience. You can read a book, catch up on your favorite podcast, or just enjoy the quiet hum of the oven. Let the steak cook until it’s about 10-15 degrees Fahrenheit below your desired final temperature.
Here’s a quick guide to target internal temperatures (remember, it will rise a few degrees during the sear and rest):
- Rare: 115-120°F (46-49°C)
- Medium-Rare: 120-125°F (49-52°C)
- Medium: 130-135°F (54-57°C)
- Medium-Well: 140-145°F (60-63°C)
This stage can take anywhere from 30 minutes to over an hour, depending on the thickness of your steak and your oven temperature. This is where your meat thermometer is your superhero. Don't guess!
Step 3: The Searing Spectacle – Where the Magic Happens
Once your steak is nearing its target internal temperature, it’s time to get your sear on. This is the quick, intense part that gives you that beautiful crust. Take your steak out of the oven.
Place your cast-iron skillet (or heavy-bottomed pan) over high heat. Let it get smoking hot. Like, really hot. You want to hear an immediate, satisfying sizzle when the steak hits the pan. If you’re using an induction stovetop, crank it up. If you’re using gas, you might see flames licking the sides of the pan – that’s a good sign!
Add a high-smoke point oil to the pan, like avocado oil, grapeseed oil, or even a light olive oil (but not extra virgin, it will burn). Just enough to coat the bottom.
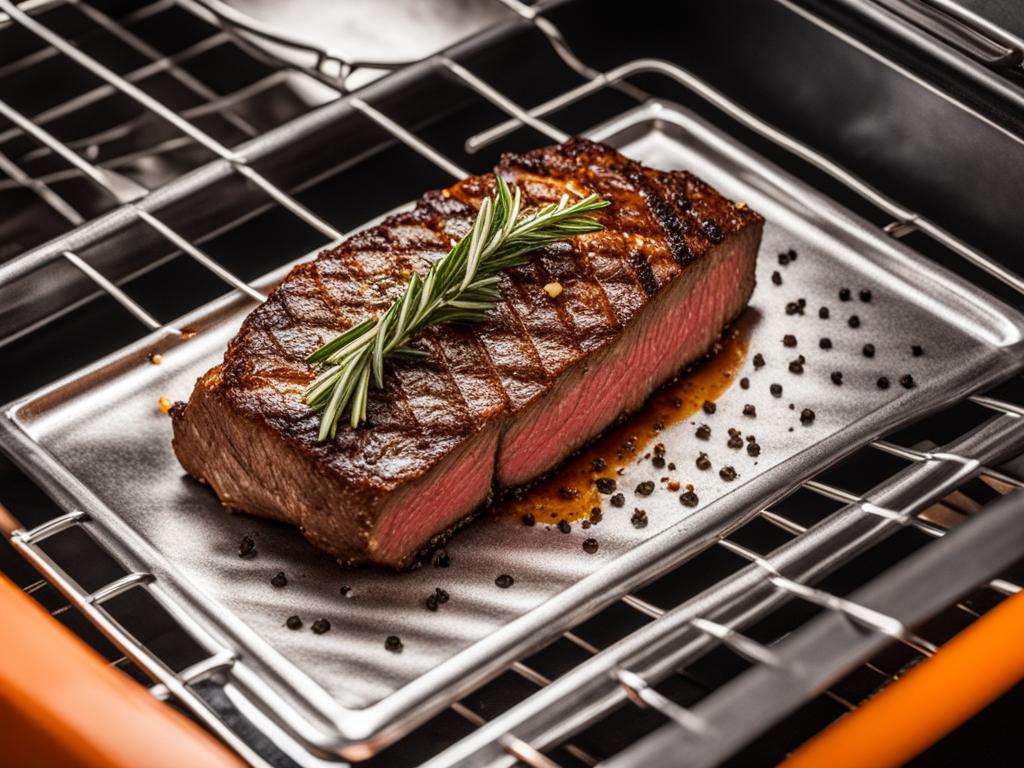
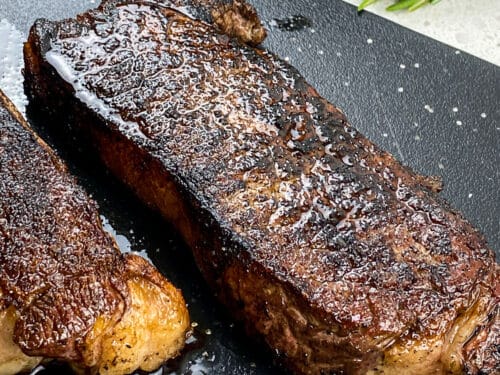
Carefully place your steak into the screaming hot pan. You should hear that glorious sizzle. Let it sear for 1-2 minutes per side. You’re looking for a deep, dark brown, caramelized crust. Don't be tempted to move it around too much. Let it do its thing!
For extra flavor and that restaurant-esque finish, this is where you can add your aromatics. Toss in a smashed clove of garlic and a sprig of rosemary or thyme. As the steak sears, tilt the pan and use a spoon to baste the steak with the melted butter (if using) and pan juices. This is pure liquid gold!
Flip the steak and repeat the searing process on the other side, basting as you go. You can also sear the edges for a few seconds if you like.
Step 4: The All-Important Rest – The Grand Finale
This is arguably the most crucial step, and it’s where many home cooks falter. Once your steak is seared to perfection and has reached your desired final temperature (remember, it's still cooking a bit!), remove it from the pan and place it on a clean cutting board or a plate. Tent it loosely with foil. This isn't about trapping heat; it's about letting the juices redistribute throughout the steak. If you cut into it too soon, all those delicious juices will run out onto the board, leaving you with a dry steak. Think of it as letting the flavor molecules have a little party and settle down before the main event.
Let it rest for at least 5-10 minutes for thinner steaks, and up to 15 minutes for thicker cuts. This resting period is non-negotiable. It's the difference between a good steak and a great steak.
Tips from the Culinary Couch Potato
Here are some little nuggets of wisdom to elevate your reverse sear game:
- Don't Overcrowd the Pan: If you're cooking multiple steaks, sear them in batches. Overcrowding will steam the steaks instead of searing them, defeating the purpose.
- Invest in a Thermometer: I can't stress this enough. It’s your ticket to steak perfection. You can find decent digital ones for under $20.
- Experiment with Seasoning: While salt and pepper are classic, feel free to experiment with garlic powder, onion powder, or your favorite steak rub. Just make sure it’s applied before the oven stage.
- Butter Basting is Boss: If you're feeling fancy, add a knob of unsalted butter, a smashed garlic clove, and a sprig of rosemary or thyme to the pan during the last minute of searing. Tilt the pan and baste the steak with the melted butter. It's like giving your steak a little flavor massage.
- Know Your Oven: Ovens can vary. Get to know how yours heats. You might need to adjust the temperature or cooking time slightly.
- Clean Up is Easy: The beauty of this method is that the low oven temp and the quick sear mean less mess than traditional pan-searing. Most of the fond (those tasty browned bits) will be in your cast iron, begging to be deglazed for a sauce.
Beyond the Strip: Other Cuts
While the New York strip is a fantastic canvas for the reverse sear, this technique works wonders on other thick cuts too! Think ribeyes, porterhouses, and even thick-cut sirloins. The key is the thickness – at least 1.5 inches is ideal.
A Little Steak History Byte
Did you know that the term "steak" likely originated from the Old Norse word "steik," meaning "to fry"? It’s believed that Vikings would cook flat pieces of meat over hot coals. So, in a way, we're connecting with ancient culinary traditions when we sear our steaks! The reverse sear is just our modern, more sophisticated take on primal cooking.
The Reflection: Steak as a Metaphor for Life
There’s something deeply satisfying about the reverse sear. It’s about intentionality. It’s about trusting the process, even when it takes a little longer. We’re not rushing to get to the final product; we’re savoring the journey. We’re creating something delicious by being patient, by preparing thoughtfully, and by giving it the right kind of heat at the right time.
Isn't that kind of how we should approach a lot of things in life? Instead of frantically searing through our days, trying to achieve instant results, maybe we could benefit from a little reverse searing in our own lives. A little low-and-slow preparation, a bit of gentle nurturing, and then a focused, intense effort when the time is right. It's about building a solid foundation, allowing things to develop evenly, and then delivering that perfect, well-earned crust of accomplishment. So go forth, embrace the slow burn, and enjoy your perfectly cooked steak – and perhaps, a more perfectly cooked life.