How To Take A Screenshot On My Asus Laptop
Alright, my fellow tech explorers and digital adventurers! Ever stared at your Asus laptop screen, utterly mesmerized by something – a hilarious meme, a brilliant idea, a recipe for the world's best chocolate chip cookies, or maybe just a really adorable cat video – and thought, "I NEED to save this moment for posterity!"? Of course, you have! We've all been there, feeling that pang of digital desire to capture the magic. But then comes the dreaded question: how do you actually do it? Fear not, for today, we're going to demystify the mystical art of taking a screenshot on your trusty Asus laptop. Prepare to become a screenshot ninja!
Think of your Asus laptop as your trusty sidekick, ready to record your digital triumphs. And a screenshot? It's like giving your sidekick a magic camera that instantly freezes whatever's on your screen. No more frantically trying to jot down notes or hoping you can find that exact webpage again. Nope! With a few simple keystrokes, you're in business. It’s like having a personal paparazzi for your laptop!
Now, Asus laptops, bless their wonderful techy hearts, are generally pretty user-friendly. They've got a few tricks up their sleeves, and taking screenshots is one of the easiest. Let's dive into the most common and, dare I say, the most fabulous method. Get ready for the star of our show: the PrtScn key!
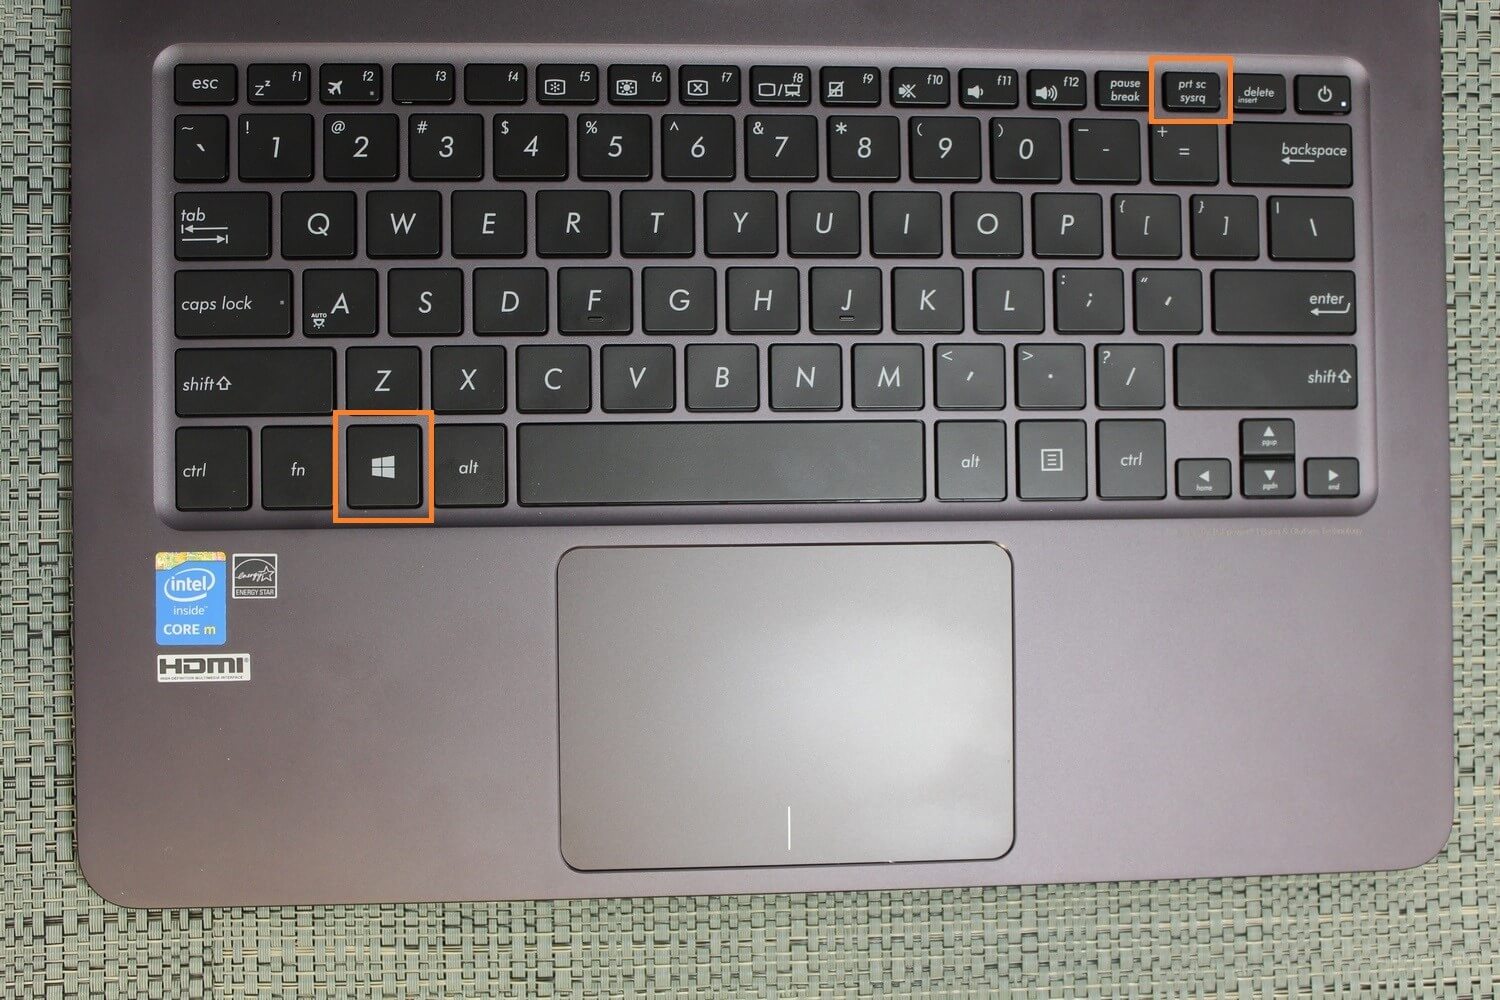
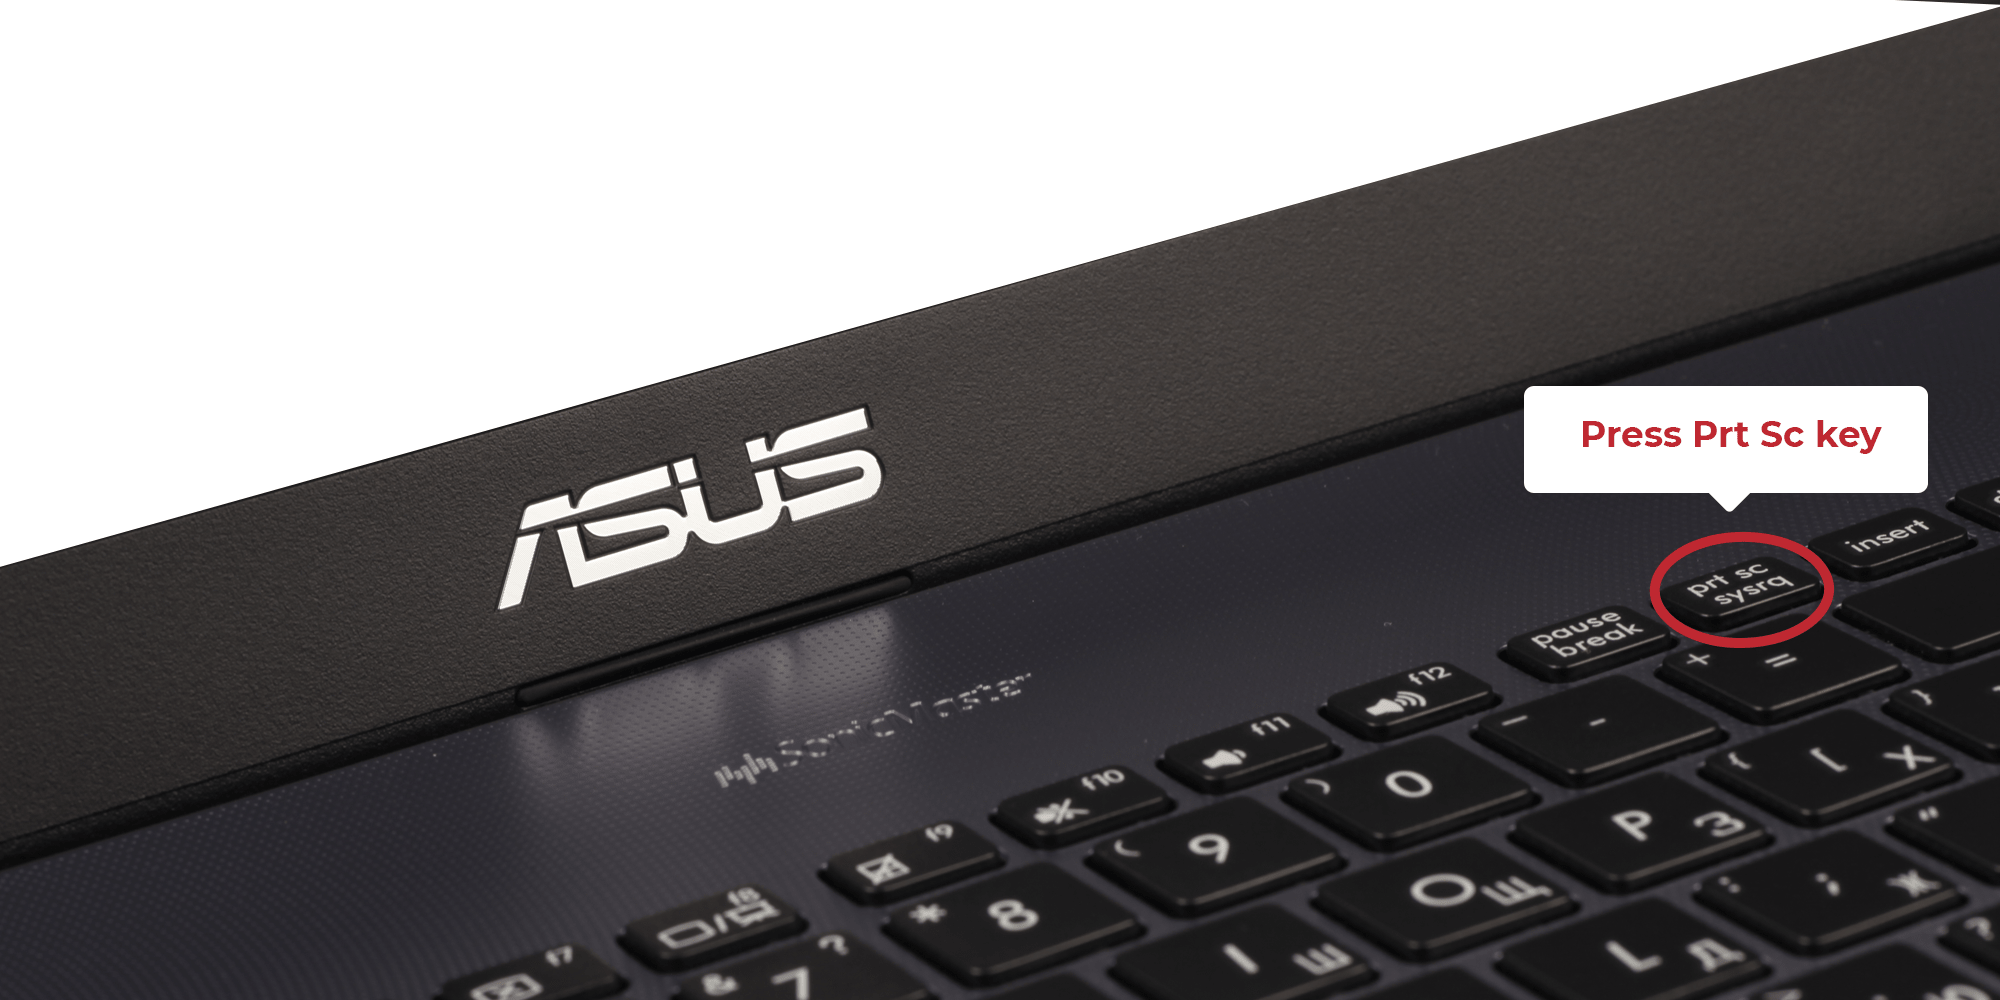
This little button, often abbreviated, stands for Print Screen. It’s like the superhero of your keyboard when it comes to capturing images. Now, find it. It’s usually up there with the other function keys, often towards the top right of your keyboard, nestled amongst the likes of F1, F2, and so on. Sometimes, it might have a tiny little picture of a screen on it, looking all proud of its mission.
Here’s the magic trick: you’re going to press the PrtScn key. Just a single press. Imagine it as a tiny digital sneeze. Achoo! And just like that, your entire screen has been captured. It’s like your laptop blinked and took a picture of itself. Pretty neat, right? But where does this magical picture go? It’s not like it pops out of a little printer slot. Nope, it gets saved to your clipboard. Think of your clipboard as a temporary holding pen for anything you copy or cut. So, you've captured it, but it's just hanging out in digital limbo for a moment.
To get that captured magic out of limbo and onto something tangible (well, digitally tangible, at least!), you need to paste it somewhere. The most common and easiest place to paste your screenshot is into a program that can display images or text. My personal favorite for this is Paint. Yes, good old Paint! It’s like the digital equivalent of a blank canvas, ready to receive your masterpiece.
So, how do you get to Paint? Easy peasy! Click on your Start Menu (that little Windows icon, usually in the bottom left corner). Then, in the search bar, type "Paint". And poof! There it is, ready for action. Open it up. You'll see a big, blank white space. Perfect! Now, with Paint open, you need to paste your screenshot. This is where the other magic key comes in: Ctrl + V. Hold down the Ctrl key (it’s usually near the bottom left of your keyboard), and while you’re holding it, press the V key. And bam! Your screenshot, the entire glorious thing, will appear on your Paint canvas.
Once it’s there, you can do all sorts of fun things. You can crop out just the bits you want, add silly arrows, write hilarious captions, or even doodle a little mustache on that cat. Then, you can save it! Go to File > Save As, and choose where you want to store your precious captured moment. You’ve officially become a screenshot artist!
But wait, there’s more! What if you don’t want the entire screen? What if it’s just that one tiny, magnificent window you want to capture? Perhaps it's the exact moment your favorite character did something epic, or a particularly witty comment from a friend. For these more specific needs, we have another heroic key combination: Alt + PrtScn.
This is like the sniper rifle of screenshots. Hold down the Alt key (usually to the left of the spacebar) and press the PrtScn key. Zap! This captures only the active window. That means whatever window you are currently working in, the one with the blueish highlight around its top bar, is the one that gets immortalized. And just like before, this screenshot also lands on your clipboard. So, you’ll still need to open up Paint (or another image program) and press Ctrl + V to see it and save it.
Now, some newer Asus laptops, or those running the latest Windows, might have even more streamlined ways. You might encounter a key with a little camera icon on it. If you do, chances are pressing it (or a combination involving it) will directly save your screenshot to a folder! But the PrtScn and Alt + PrtScn methods are the tried-and-true workhorses that will serve you well on almost any Asus laptop. They are the reliable old friends of the screenshot world.
So there you have it! Taking a screenshot on your Asus laptop is not some arcane ritual performed by digital wizards. It's a simple, powerful tool at your fingertips, ready to capture those fleeting moments of digital glory. Go forth and screenshot with confidence! Your memories (and your friends’ funny screenshots) will thank you!
Remember: PrtScn for the whole screen, Alt + PrtScn for just the active window. And don't forget the magic paste: Ctrl + V!
Blog of Awesome Screenshot & Recorder
