How To Sterilize Bottles With Boiling Water

So, you're a new parent, huh? Or maybe you're just helping out a friend or family member who is. Either way, welcome to the wonderful, slightly-sticky world of baby bottles. And with baby bottles comes… you guessed it… sterilizing. Oh, the joy!
Now, before you start picturing some fancy, spaceship-like sterilizing contraption that costs more than your first car, let's talk about the OG method. The one your grandma probably used (and her grandma before her!). We're talking about good ol' fashioned, tried-and-true, boiling water. Yes, it's that simple. And honestly? It works like a charm. So grab your mug, settle in, and let's chat about how to make those little milk-catchers squeaky clean and germ-free.
Boiling Water: Your Secret Weapon Against Tiny Germs
Okay, let's get real for a second. Babies are adorable, but their immune systems are still a work in progress. Like a brand-new puppy, they need a little extra protection. And those little bits of leftover milk in the bottles? They can be a breeding ground for all sorts of unwelcome microscopic critters. Ew.
But don't panic! Boiling water is your superhero. It's like a tiny, steamy army that swoops in and obliterates any nasty bacteria or viruses that might be lurking. Think of it as a spa day for your bottles, but instead of cucumber slices, they get a good, hot soak. A really hot soak.
Why Boiling? It's All About the Heat!
The magic of boiling water is simple science, really. When water hits that boiling point – 212 degrees Fahrenheit (100 degrees Celsius) – it's hot enough to kill off most of the common germs that can make your little one sick. Viruses, bacteria, all those things you definitely don't want them ingesting. Poof! Gone.
It's a surprisingly effective and incredibly budget-friendly method. No need for special gadgets, no need for fancy cleaning solutions. Just water, heat, and a little bit of patience. What more could you ask for when you're already running on zero sleep and copious amounts of caffeine?
Getting Started: What You'll Need
Alright, let's get down to business. You don't need a whole lot for this operation. Just a few basic kitchen essentials.
- A big pot. Like, really big. Big enough to hold all your bottles, nipples, rings, and whatever else needs a good scrub, without them being all squished together. You want them to have room to… well, to boil!
- Tongs. Or a slotted spoon. Something to safely retrieve those super-hot bottles from the boiling abyss. Trust me, you do not want to be reaching in with your bare hands. That's a one-way ticket to a very painful burn.
- A clean towel or drying rack. For your freshly sterilized goodies to air dry.
- And, of course, your baby bottles and their bits. Make sure they're already washed! We'll get to that in a sec.
See? Not exactly rocket science. Just your everyday kitchen stuff.
Pre-Wash Power: Don't Skip This Step!
Now, here's a crucial little tip that some people might gloss over, but you, my friend, will be way ahead of the game by remembering it. Before you even think about boiling, you gotta wash those bottles. Thoroughly.
Why? Because boiling water is great at killing germs, but it's not a miracle worker that can scrub away dried-on milk residue. You want to get rid of as much of that gunk as possible before you start the sterilization process. So, give them a good scrub with warm, soapy water. Get into all the nooks and crannies. Think of yourself as a microscopic detective, uncovering every last speck of milk.
Use a bottle brush – they're designed for this exact purpose. And don't forget the nipples! Those little guys can be tricky. Make sure there's no milk film on the inside or outside. A clean bottle is a happy bottle, and a happy bottle is a sterilized bottle. It's a whole cycle of happiness, really!
The Boiling Process: Let's Dive In!
Okay, you've got your clean bottles, you've got your big pot, and you're ready to go. Here's the step-by-step breakdown. It’s not complicated, I promise!
- Fill the pot. Pour enough water into your pot to completely submerge all the bottle parts. You want them floating freely, not peeking out like they're trying to catch some rays.
- Bring to a boil. Put the pot on the stove over high heat and let that water come to a rolling boil. Watch it! You'll see those bubbles start to form, getting bigger and more enthusiastic.
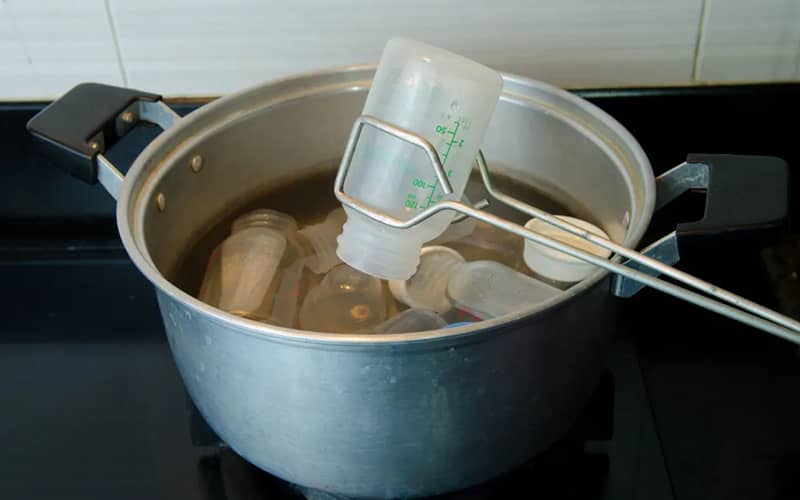
- Carefully add the bottles. Once the water is boiling vigorously, it's time to introduce your clean bottle parts. This is where those tongs come in handy. Gently lower each piece into the boiling water. Be careful not to splash! Hot water is no joke.
- Let them boil. Here's the key part: let the bottles and their parts boil for at least five minutes. Yes, five whole minutes. Set a timer if you need to. Don't just eyeball it. Those five minutes are crucial for ensuring all the germy baddies are… well, banished.
- Turn off the heat. After five minutes, turn off the stove. But don't just yank everything out immediately. Let the water cool down a bit first. It's still going to be very hot, so safety first!
- Remove with care. Once the water has cooled down a bit – still warm, but not scalding – use your tongs or slotted spoon to carefully remove the bottles and their parts.
- Drain and dry. Place the sterilized items on a clean towel or a drying rack to air dry completely. Don't put them away wet! That's just inviting new germs to move in.
And there you have it! Perfectly sterilized bottles, ready for their next milk-filled adventure. Easy peasy, right?
A Few Extra Tips to Keep You Sane
Because let's be honest, parenthood is all about those little extra tips that make life just a tiny bit easier. Here are a few more for your sterilizing journey:
- Batch sterilizing. If you're like me and prefer to get things done in one go, you can sterilize a whole batch of bottles at once. Just make sure your pot is big enough! This is especially helpful if you have multiple little ones or just want to get ahead.
- When to sterilize. For newborns and babies under three months old, or those with weakened immune systems, it's generally recommended to sterilize bottles after every use. As your baby gets older, your pediatrician might suggest you can scale back a bit. Always check with your doctor, though! They're the experts.
- What about the lids? Yep, lids, rings, caps – everything that comes into contact with the milk or the baby's mouth needs to be sterilized. Don't forget them!
- Consider plastic vs. glass. If you're using plastic bottles, make sure they're heat-safe. Most are, but it's always good to double-check the manufacturer's instructions. Glass bottles are usually pretty indestructible in boiling water, but be careful not to drop them!
- Don't overcomplicate it. Seriously. Boiling water is a fantastic, simple method. You don't need to buy a fancy sterilizer if you don't want to. This is a perfectly good way to keep your baby safe and healthy.
When to Call in the Big Guns (or Maybe Just a Dishwasher)
Now, I know what you might be thinking: "But what about my dishwasher?" Ah, yes. The magical appliance that cleans everything. And for older, healthier babies, some dishwashers with a sanitizing cycle can be a good option.
However, for those brand-new babes, or if your doctor recommends it, boiling is still the gold standard. It’s the most reliable way to ensure everything is truly germ-free. Think of it as the extra-special treatment for your tiny human.
And if you do use a dishwasher, make sure the bottles are on the top rack and that it has a hot water cycle. But honestly, for peace of mind with a newborn? Boiling is hard to beat. It’s just so… definitive. No wondering if the water got hot enough, no fiddling with settings. Just a good, old-fashioned boil.
The Takeaway: You Got This!
So, there you have it. Sterilizing baby bottles with boiling water. It’s not scary, it’s not complicated, and it’s incredibly effective. You’re doing an amazing job taking care of your little one, and this is just one more way you're ensuring their health and safety.

Don't let the jargon or the fancy gadgets intimidate you. Sometimes, the simplest solutions are the best ones. So next time you're faced with a pile of used bottles, just remember your big pot, your tongs, and your trusty stovetop. You've got this! And hey, maybe that five-minute boil is even a good excuse to step away for a moment, take a deep breath, and remember why you're doing all this in the first place. For that adorable little face, of course!