How To Get Rust Off Of Garden Tools

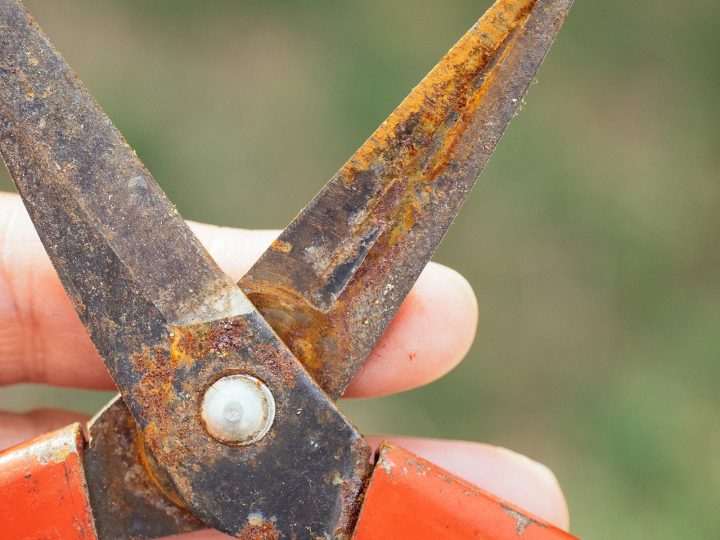
My trusty trowel, bless its rusty heart, had seen better days. I’m talking properly rusty days. Like, if it were a person, it’d be whispering tales of the Great War and complaining about the price of butter. It’s been a staple in my gardening adventures, a silent partner in my attempts to coax life from the soil. But after a particularly damp autumn and a winter spent exiled in the shed, it emerged looking like it had wrestled a medieval knight and lost. Badly.
Honestly, it was a bit embarrassing. I used to be so proud of my gleaming tools, lined up like a tiny, happy army ready to conquer weeds and plant seedlings. Now, my trowel looked more like a relic from a pirate’s buried treasure, minus the treasure part. It made me wonder, “Am I a terrible gardener if my tools are falling apart?” Probably not, but it felt like a personal failing nonetheless. And then it hit me: if I’m struggling with a rusty trowel, chances are, a lot of you are too! So, let’s dive into the wonderful, slightly gritty world of de-rusting our beloved garden companions. Because nobody deserves a rusty spade, right?
The Battle Against the Brown Menace
Rust. The bane of metal objects everywhere, especially the ones you actually use outdoors. It’s like nature’s way of saying, “Hey, you left me out in the rain again, didn’t you?” And it’s not just unsightly; rust can actually damage your tools, making them less effective and even shortening their lifespan. A rusty blade won’t cut as cleanly, a rusty hinge will stick, and a rusty handle is just… well, depressing.

But fear not, fellow gardeners! Getting rid of rust doesn’t require a degree in metallurgy or a trip to a special tool spa. We’ve got a whole arsenal of DIY solutions right under our noses (or in our kitchen cupboards, as it turns out).
The Gentle Approach: Vinegar Power
Let’s start with one of the most popular and surprisingly effective methods: vinegar. Yep, that tangy stuff you use for salad dressing or to clean windows can work wonders on rust. It’s a mild acid, and acids are like little rust-eaters. They break down the iron oxide (that’s rust’s fancy name) without being too harsh on the underlying metal.
How to do it:
The simplest way is to soak your rusty tool in plain white vinegar. You can use a bucket, a large container, or even a plastic bag if it’s just a small item. Make sure the entire rusty part is submerged.
Now, here’s where patience comes in. You can’t just dunk and expect miracles. For light rust, a few hours might do the trick. For more stubborn patches, you might need to leave it overnight, or even for 24 hours. Check it periodically. You’ll probably see the water turn a lovely shade of brown – that’s the rust doing its thing!
Once it’s had a good soak, take it out and give it a good scrub. An old toothbrush, a steel wool pad, or even a stiff scrub brush will work wonders. You’ll be amazed at how easily the rust lifts off. It’s almost… satisfying. Don't you just love it when a plan comes together?
Pro Tip: After scrubbing, rinse the tool thoroughly with water and then, and this is crucial, dry it immediately. Water is rust’s best friend, so you don’t want to give it any more encouragement. A quick wipe-down with a clean cloth is a must.
The Slightly More Enthusiastic Approach: Baking Soda Paste
If vinegar feels a bit too… vinegary for your liking, or if you want to get a bit more hands-on with your scrubbing, baking soda is your new best friend. It's less of a soaking solution and more of a scrubbing paste, which is great for targeting specific areas or for tools that are too large to soak easily.
How to do it:
Mix baking soda with just enough water to form a thick paste. Think toothpaste consistency, but maybe a little runnier so it spreads easily. Apply this paste liberally to the rusty areas of your tool.
Let the paste sit on the rust for an hour or two. This gives the baking soda time to work its magic. Then, grab your scrubbing tool of choice – steel wool, a scrub brush, or even crumpled-up aluminum foil (yes, really!) – and start to scrub away the rust.
The baking soda acts as a mild abrasive, helping to lift the rust particles without scratching the metal too deeply. You’ll need to put in a little elbow grease here, but the results are often quite impressive. Don’t be afraid to get a little messy; that’s part of the fun, right?
As with the vinegar method, rinse your tool thoroughly once you’ve scrubbed away all the rust. And again, dry it completely immediately after rinsing. No exceptions!
The Abrasive Avengers: Steel Wool and Sandpaper
Sometimes, you just need to go in with a bit more brute force. For those stubborn, deeply embedded rust spots, steel wool and sandpaper can be your best allies. These are your go-to for when the chemical approaches aren’t cutting it.
How to do it:
For light to moderate rust, a pad of fine-grade steel wool (like #0000) is often enough. You can use it dry, or with a little bit of oil (vegetable oil or WD-40 works well) to help lubricate and pick up the rust particles.
Rub the rusty areas with the steel wool in a back-and-forth motion. You’ll feel the rust starting to loosen. Keep going until the rust is gone. If you’re using oil, wipe away the residue as you go.
For more severe rust, you might need to step up to sandpaper. Start with a medium grit (like 100-150) to knock off the bulk of the rust, and then move to a finer grit (220 or higher) to smooth out the surface.
Important Note: Be mindful of the metal you’re working with. For softer metals or tools with a polished finish, aggressive scrubbing with coarse steel wool or sandpaper can leave scratches. Always start with the gentlest method that might work and escalate only if necessary. And again, dry thoroughly after your efforts!
The Unexpected Hero: Potato Power (Yes, Really!)
Okay, this one sounds a bit… out there. But I’ve heard whispers, seen it in hushed tones online, and I’m here to confirm: a potato can actually help with rust! It sounds like something from a folk tale, but there’s a little science behind it.
Potatoes contain oxalic acid, which, like vinegar, is a mild acid. It’s not as potent as vinegar, but for very light rust or a quick touch-up, it can be surprisingly effective. Plus, it’s incredibly low-tech!
How to do it:
Cut a raw potato in half. For added oomph, you can dip the cut end into a bit of dish soap or baking soda first. Then, rub the cut surface of the potato directly onto the rusty spots of your tool. The oxalic acid will start to work on the rust.
Let it sit for a while – maybe an hour or so. Then, use the potato to scrub the rust away. It’s a bit messy, and you’ll have to keep re-cutting the potato as the surface gets gummy. But for small items or very superficial rust, it’s a fun, natural way to give your tools a little spa treatment. Who knew your gardening tools could enjoy a veggie mask?
Once you’re done, you know the drill: rinse and dry thoroughly!
The Ultimate Protector: Prevention is Key!
Now, I know we’ve spent all this time talking about removing rust, but the real secret to happy, rust-free tools is preventing it in the first place. It’s like avoiding that awkward conversation by just not starting it, you know? Much easier in the long run.
So, how do we keep the brown menace at bay?
1. Dry Them After Every Use: This is the golden rule, folks. After you’ve finished gardening, give your tools a quick wipe-down with a dry cloth. Seriously, it takes 30 seconds and will save you a world of rust-related headaches. If they’re particularly muddy, give them a quick rinse first, then dry them completely.
2. Store Them Properly: Don’t just leave them lying around in a damp shed or exposed to the elements. Store your tools in a dry, well-ventilated place. A toolbox, a garden shed with good airflow, or even hanging them up can make a big difference.
3. Oil Them Up (Periodically): Once a year, or even twice a year if you live in a humid climate, give your metal tools a light coating of oil. You can use a multipurpose lubricant like WD-40, but even vegetable oil or mineral oil will do the job. Wipe on a thin layer, and then wipe off any excess. This creates a protective barrier against moisture.
4. Sharpen and Clean Regularly: Keeping your tools clean and sharp not only makes them work better but also helps prevent rust. Dirt and debris can trap moisture, so a good clean-out is always beneficial.
My trowel, after its vinegar bath and a good scrub, is now looking positively gleamy. It’s not brand new, of course, and it still bears the honorable scars of past digging endeavors. But it’s functional, it’s pleasant to hold, and it doesn’t look like it’s auditioning for a role in a zombie apocalypse. And that, my friends, is a win in my book. So go forth, arm yourself with vinegar and baking soda, and give your trusty garden companions the TLC they deserve!