How To Delete Empty Cells In Google Sheets

Ah, Google Sheets. It’s the digital playground where our grand plans, grocery lists, and sometimes, just random thoughts, come to life. We spend hours crafting our spreadsheets, meticulously filling in every little detail, or so we think.
Then it happens. You’ve got a beautiful spreadsheet, a masterpiece really. But lurking in the corners, like forgotten socks behind the dryer, are those elusive empty cells. They’re the digital equivalent of that one missing Lego brick – you know it’s supposed to be there, but where?
These little blank spaces can be a tad… annoying. They’re not doing any harm, per se, but they’re just… there. Like a polite guest who overstays their welcome, they just don’t add to the party.

And sometimes, these empty cells can play a sneaky trick on you. You might be trying to sort your amazing data, only to find these blank spaces messing up your perfectly ordered world. It's like trying to line up your favorite books by height, and finding an invisible book that throws everything off.
So, what’s a spreadsheet enthusiast to do? Do we just live with them? Embrace the chaos? Nah! Google Sheets, in its infinite wisdom, offers us a way to banish these blank bothersome bits.
Imagine a magical wand, but for spreadsheets. A way to wave your digital hand and poof – those empty cells vanish, leaving your data looking sleek and organized. It’s not quite magic, but it feels pretty close, doesn’t it?
The first step in our little adventure is to get acquainted with our spreadsheet. Take a good look at it. Does it sparkle with data, or does it have little patches of digital desert?
You might be thinking, "But how do I even find these empty cells?" They're like ninjas, blending into the background. But fear not, for we have a method. Think of it as a treasure hunt, but the treasure is a clean, uncluttered spreadsheet.
Our first helpful tool is none other than the trusty Find and Replace feature. It’s like a super-powered magnifying glass for your data. You can tell it exactly what you're looking for, and it will point it out.
So, here's the secret handshake: we’re going to ask Google Sheets to “find” our empty cells. It’s like whispering a secret code into the spreadsheet’s ear.
To do this, you'll want to select the area where you suspect these little space-invaders are hiding. This could be a single column, a few rows, or even your entire glorious spreadsheet.
Once you've highlighted your search zone, it's time to unleash the power of Ctrl+F (or Cmd+F on a Mac). This is your shortcut to the land of finding. A little box will pop up, ready for your command.
In that little box, you don't type words, oh no. You're going to leave it completely, utterly, gloriously blank. That's right, just an empty space. This is how you tell Google Sheets, "Show me all the emptiness!"
Then, you hit "Find all". And like magic, Google Sheets will highlight every single cell that is as bare as a freshly wiped slate. It’s quite a sight, seeing all those blank spots illuminated.
Now, you might be tempted to just hit the delete key. But hold your horses! We're going for a more elegant solution. We want to make them disappear, not just leave a void where they once were.
Here's where the real fun begins. Instead of deleting, we're going to use the "Replace with" option. And what do we want to replace our empty cells with? Nothing! We want to replace them with… well, nothing!
So, in the "Replace with" box, you also leave it blank. It might seem counterintuitive, but trust the process. We are essentially telling Google Sheets to replace "nothing" with "nothing." This might sound like a philosophical debate for your spreadsheet, but it works!
Then, you click "Replace all". And just like that, those empty cells that were bothering you? They're gone. Vanished. Into the digital ether they went.
It’s a little bit like decluttering your desk. You’re not throwing things away willy-nilly; you’re tidying up, creating space for what truly matters – your important data!
But wait, there’s another, perhaps even more straightforward, way to tackle these blank spaces. This method is so simple, it’ll make you wonder why you ever put up with those empty cells in the first place.
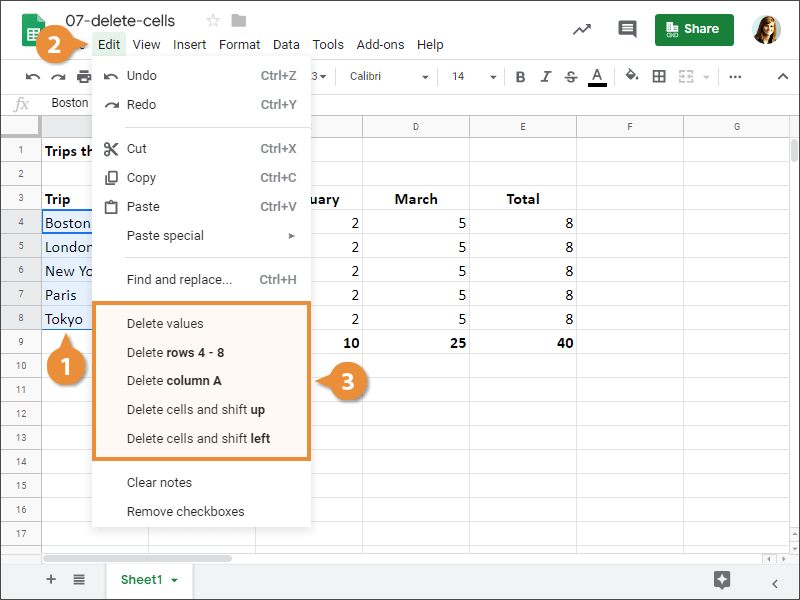
This approach involves a slightly different kind of magic, involving right-clicking. Yes, that simple click of the mouse can be a powerful tool in the world of Google Sheets.
First, you select the range of cells where you believe your empty cells are hiding. Think of it as drawing a chalk outline around the area of interest.
Then, you perform the sacred right-click. A menu will appear, like a secret decoder ring of spreadsheet commands.
Scroll down this menu, and you'll find an option that often reads "Delete cells...". This is where our journey takes a slightly more direct route.
When you click on "Delete cells...", a little box pops up with a few choices. It’s like a fork in the road for your empty cells.
You'll see options like "Shift cells left" or "Shift cells up." This is where you get to decide how your data will rearrange itself to fill the newly created space.
If you want to get rid of those empty cells and have the cells to their right slide over to fill the gap, you choose "Shift cells left". It’s like a graceful dance where data moves to fill the void.
Alternatively, if your empty cells are at the bottom of a column, you can choose "Shift cells up". This makes the data above them tumble down, filling the space with a satisfying digital cascade.
And that's it! With a few clicks, your spreadsheet is free from the tyranny of empty cells. It’s a small victory, perhaps, but a deeply satisfying one.
Imagine your spreadsheet now. It’s clean, it’s organized, it’s a joy to behold. No more visual clutter, no more data-sorting woes. It’s the spreadsheet you always dreamed of!
This process is like giving your spreadsheet a spa treatment. A refreshing cleanse that leaves it looking its absolute best. And the best part? It’s surprisingly easy to do.
So, the next time you find yourself battling those pesky empty cells, remember these simple tricks. They’re your secret weapons for a perfectly polished Google Sheet.
It's amazing how a little bit of digital tidiness can make all the difference. Your spreadsheets will thank you, and your brain will thank you.
Go forth and conquer those empty cells! Make your data shine, and enjoy the newfound clarity. Happy spreading!