How To Clean A Couch With Non Removable Cushions

So, you’ve got a couch. Awesome! And it’s comfy, right? But wait. Those cushions. They’re part of the couch. Like, really part of the couch. Non-removable. Ugh. The ultimate upholstery conundrum. Don’t panic, friend! We’re diving into the wonderfully weird world of couch cleaning. It’s not a science experiment, it’s an adventure. A slightly dusty, potentially crumb-filled adventure.
Let’s be honest. Cleaning a couch with integrated cushions can feel like trying to hug a porcupine. You want to be thorough, but also, you don't want to damage your beloved sanctuary of naps. It’s a delicate dance. A tango of tidiness. And frankly, it’s way more interesting than folding laundry. Anyone can fold socks. But conquering the unmovable cushion? That, my friend, is art.
First things first. Let’s acknowledge the sheer brilliance of these designers. Who decided this was a good idea? Was it to prevent accidental cushion theft by rogue squirrels? Or perhaps a secret plot to make us all more resourceful? We’ll never truly know. But here we are, armed with our curiosity and a few cleaning supplies, ready to face the challenge. It’s like a puzzle, but with more fabric. And possibly ancient Cheeto dust.
Our mission, should we choose to accept it, is to banish the grime. To restore the glory. To make your couch look less like a forgotten archaeological dig and more like the pristine piece of furniture it once was. Or, you know, just less… lived-in. We’re not aiming for museum quality here. Unless your museum is dedicated to “Comfort and Occasional Snack Mishaps.”
The Pre-Game Hype: What You'll Need
Before we get our hands dirty (or clean, depending on your perspective), let’s gather our arsenal. Think of it as your couch-cleaning superhero kit. You want to be prepared. No half-measures allowed! We’re going in!
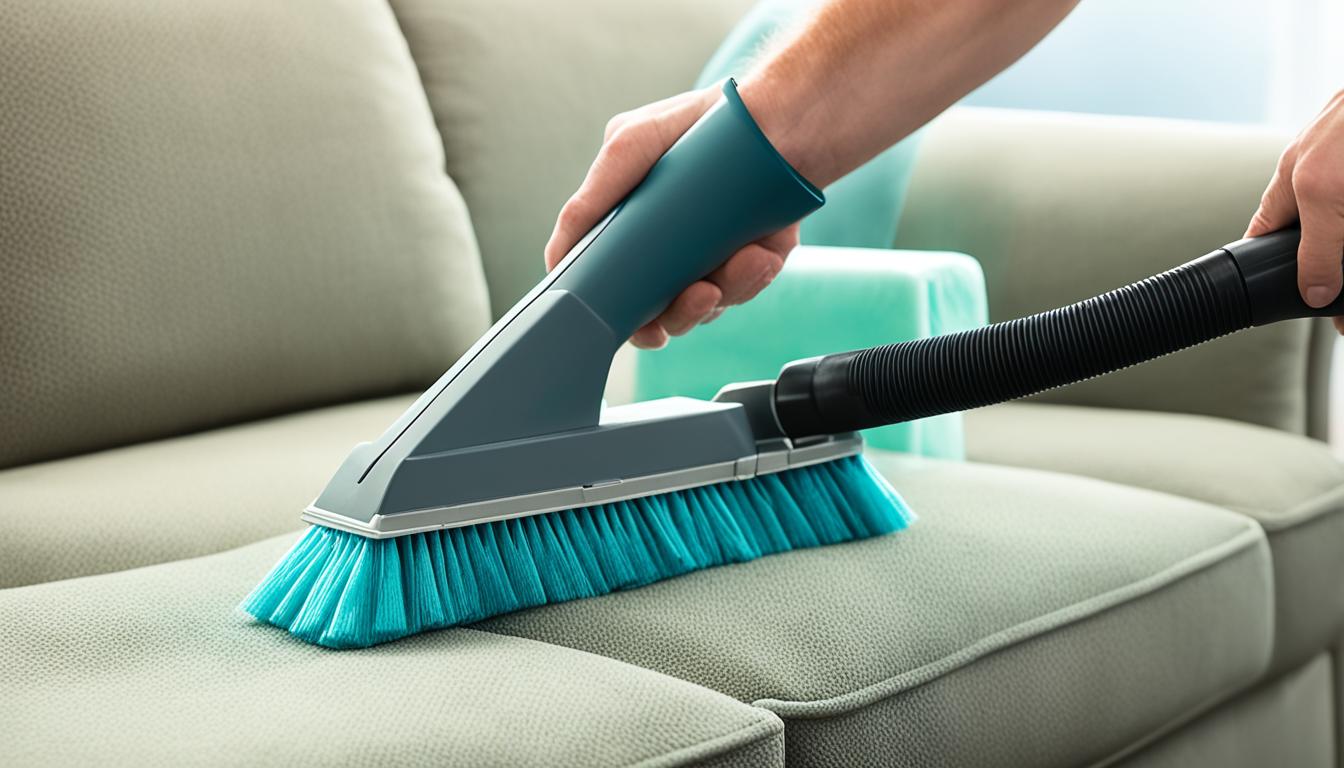
The Mighty Vacuum. This is your trusty steed. Your first line of defense. You need one with attachments. Seriously. That crevice tool? It’s a lifesaver. It’s like the tiny, determined detective of your sofa. It will unearth treasures you didn't even know existed. Probably.
Microfiber Cloths. Lots of them. These are your gentle giants. They’re soft but effective. Think of them as fluffy little assistants. They’ll wipe away spills and buff out stubborn marks. And they won’t scratch your delicate upholstery. Unless it’s made of sandpaper. Then, maybe. But we’re assuming normal couch materials here.
A Mild Cleaning Solution. This is where things get interesting. You don’t want anything too harsh. We’re not scrubbing a barn, people! Think gentle. A little dish soap mixed with water? Perfect. Or a specialized upholstery cleaner? Even better. Always, always do a patch test in an inconspicuous spot first. Nobody wants a giant, discolored stain as a souvenir of their cleaning efforts. That’s a rookie mistake. A big, embarrassing, couch-shaped mistake.
A Spray Bottle. For your cleaning solution. This gives you control. You can spritz where you need it, not drench the entire thing. Precision is key. Like a tiny, fabric-targeting sniper. Pew pew! (But with less noise and more freshness).
A Soft Brush. For those stubborn bits. Think of it as a gentle persuader. It can coax out dirt that’s decided to take up permanent residence. Just don’t go all drill sergeant on it. We’re aiming for a spa day for your couch, not an interrogation.
Baking Soda. Oh, baking soda. The unsung hero of the household. It’s a natural deodorizer and a mild cleaner. It’s like the Swiss Army knife of cleaning. It tackles odors like a champ. And it’s surprisingly satisfying to sprinkle. So, go ahead. Get your sprinkle on!
Patience. This is crucial. Seriously. It’s not going to magically sparkle in five minutes. This is a marathon, not a sprint. So, put on some tunes, grab a beverage, and enjoy the process. Or at least tolerate it with a smile.
The Grand Reveal: Tackling the Unmovable Beast
Alright, team. The supplies are gathered. The battlefield is prepped. Let’s do this thing!
Step 1: The Great De-Crumbification
This is where your vacuum shines. Start with the main surface. Get all those loose crumbs, dust bunnies, and stray glitter particles. You know, the ones from that one craft project that went a little too far. Then, switch to your crevice tool. Dive into every nook and cranny. Pretend you’re an explorer discovering ancient artifacts. These artifacts might be popcorn kernels. Or a missing Lego. Either way, they’re coming out!
Don’t forget the back. And the sides. And under the skirt, if your couch has one. No corner is too obscure. No gap is too small. We are thorough. This is the foundation of your cleaning. A clean base makes everything else so much easier.
Step 2: The Odor Obliteration
Got any lingering smells? That “mystery” stain from last week? That’s where baking soda comes in. Sprinkle a generous amount over the entire couch. Really get it in there. Don’t be shy. Let it sit for a few hours, or even overnight. The longer it sits, the more it absorbs those pesky odors. It’s like a scent-sucking ninja.
Then, vacuum it all up. You’ll be amazed at how much fresher your couch smells. It’s like a breath of fresh air, but for your furniture. And no, it won’t leave white streaks. If it does, you probably didn’t vacuum it up well enough. Oops. Try again!
Step 3: The Spot Treatment Symphony
Now for the spills. The drips. The oopsies. Grab your spray bottle with your mild cleaning solution. Lightly spritz the affected area. Don’t soak it! We’re not giving your couch a bath. Just a gentle cleanse.
Take your microfiber cloth and gently blot the stain. Work from the outside in. This prevents spreading. Think of it as gently encouraging the stain to leave. “Please, stain, you’re not welcome here anymore.” If the stain is stubborn, use your soft brush to gently work the solution in. Then, blot again.
This is where patience is your best friend. Some stains are tougher than others. You might need to repeat the process a few times. But don’t give up! Your couch will thank you. Probably with extra comfy seating.
Step 4: The General Refresh
Once you’ve tackled the spots, you can give the whole couch a light refresh. Lightly mist the surface with your cleaning solution. Then, with a clean microfiber cloth, gently wipe down the entire couch. This will help even out the moisture and give it a generally cleaner feel.
Again, light is key. You want to dampen the fabric, not saturate it. Too much moisture can lead to mildew or water stains. We’re aiming for clean and fresh, not soggy and sad. This is a delicate operation.
The Cool-Down Period: Letting Your Couch Breathe
Once you’re done cleaning, it’s time for the crucial cool-down. Let your couch air dry completely. Open windows if you can. Turn on a fan. Give it plenty of time to breathe.
Resist the urge to flop down on it immediately. It might feel dry to the touch, but there could still be hidden moisture. And a wet couch is an unhappy couch. And an unhappy couch makes for an unhappy you. We don’t want that.
Quirky fact: Did you know that some fabrics can take up to 24 hours to dry completely, depending on humidity and airflow? That’s longer than some movies! So, plan accordingly. Maybe reschedule that couch-centric movie marathon for tomorrow.
And there you have it! Your couch, transformed. It might not be brand new, but it’s definitely cleaner, fresher, and more inviting. You’ve conquered the unmovable cushion. You’ve faced the crumb abyss. You’re a couch-cleaning hero! Now, go forth and enjoy your revitalized seating. You’ve earned it. And maybe, just maybe, you’ve discovered a secret talent for upholstery preservation. Who knew?