How To Build Wood Gate For Driveway
Hey there, fellow DIY enthusiast! So, you're thinking about building a driveway gate? Awesome! It's like putting a fancy crown on your whole property, right? And a wooden one? Even better. It’s got that rustic charm, that handcrafted feel. Plus, you know, keeping your car from rolling down the street when you forget the parking brake. Minor detail. So grab your favorite mug, let's chat about how we're gonna tackle this gate-building adventure. It's not rocket science, promise. Well, unless your gate needs to launch small satellites. Then maybe we need to have a different chat. Ha!
First things first, let's talk about planning. This is the secret sauce, the behind-the-scenes magic that makes everything else a breeze. Or at least, less of a hurricane. You wouldn't build a house without a blueprint, and you definitely shouldn't build a gate without one. So, grab a notebook, a pencil (or your trusty tablet), and let's sketch this thing out. What kind of vibe are we going for? Modern minimalist? Classic picket fence style? Or are we talking full-on fairytale castle gate? You decide!
Think about the size. Seriously, measure twice, cut once. Or, you know, measure fifty times, cut once, just to be safe. You don't want a gate that's too narrow for your car, or one that's so wide it looks like it's about to swallow your neighbor's prize-winning petunias. Measure the width of your driveway where the gate will go. And don't forget to consider the swing. Will it swing inwards or outwards? If it swings inwards, make sure there’s enough clearance. Nobody wants to be playing Tetris with their car and their gate. Or worse, ending up with a permanently mangled mailbox. Ouch.

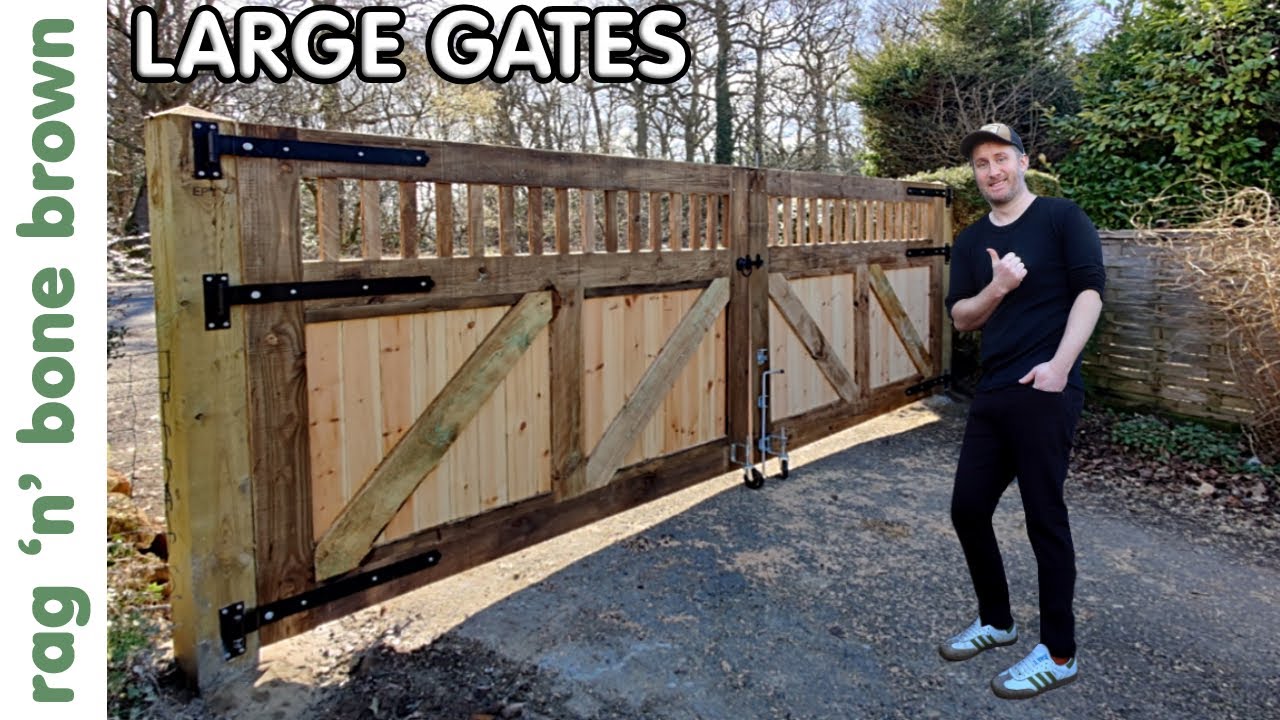
Now, let's talk about the design. This is where the fun really starts. Are we going for a solid, imposing gate that screams "Keep Out!" (unless you have the secret handshake, of course)? Or maybe something a little more open and airy, letting the breeze (and your neighbors’ curious glances) flow through? You can add decorative elements like diagonal bracing, arched tops, or even some fancy post caps. Think of it as accessorizing your driveway. What kind of earrings would your driveway wear? Gold hoops? Dainty studs? The possibilities are endless!
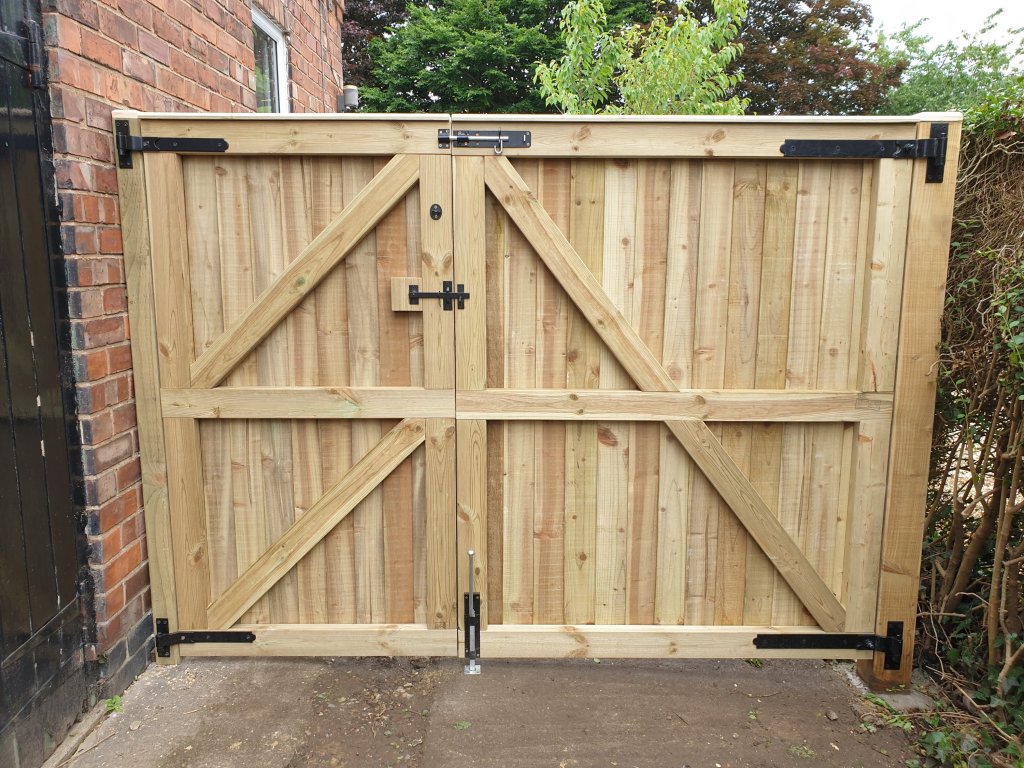
Once you've got your design doodled, it's time to think about the materials. Wood, glorious wood! But what kind of wood? This is a biggie. You want something that can stand up to the elements, you know, rain, shine, probably the occasional rogue squirrel with an agenda. Cedar and redwood are fantastic choices. They're naturally resistant to rot and insects. A bit pricier, maybe, but so worth it in the long run. Think of it as an investment in your sanity. Or, you know, in not having to rebuild your gate every other year. Pressure-treated pine is also an option, and it's usually more budget-friendly. Just make sure it's rated for ground contact if you’re setting posts in concrete. Safety first, folks!
Don't forget about the hardware! Hinges, latches, bolts, screws… these little guys are the unsung heroes of your gate. You’ll need sturdy hinges that can handle the weight of your masterpiece. And a latch that’s secure enough to keep out uninvited guests, but easy enough for you to operate when you’re juggling groceries and a toddler. Consider using galvanized or stainless steel hardware to prevent rust. Nobody likes a rusty hinge that groans like a grumpy old man every time the gate opens. Ugh.
Alright, so you've got your plan, your design, and your materials. Now for the fun part: the actual building! Let's start with the posts. These are the backbone of your gate. You'll want to dig holes for your posts. How deep, you ask? A good rule of thumb is to go about a third of the post's length into the ground. So if your posts are 8 feet long, you'll bury about 2.5 to 3 feet. And make sure they're level! Nobody wants a lopsided gate. Trust me. Use a level, check from all angles. Imagine you're a detective, meticulously examining your post for any signs of deception. "Aha! You're leaning! I see your game!"
Once your holes are dug, it's time to set the posts. Some people use gravel at the bottom for drainage. Others go straight for the concrete. Concrete is usually the most secure option, creating a solid foundation. You can buy pre-mixed concrete, which is super convenient. Just add water, stir, and pour. Easy peasy. Make sure your posts are plumb (that's fancy talk for perfectly vertical) while the concrete is wet. You can use temporary braces to hold them in place until the concrete sets. And let it cure properly! Don't rush this. Patience, young grasshopper.
Now that your posts are standing tall and proud, it's time to build the actual gate panel. This is where your design really comes to life. You'll likely be working with 2x4s or 2x6s for the frame. Cut your pieces to size according to your plan. Remember: measure twice, cut once! Did I mention that already? It bears repeating. You'll want to create a sturdy rectangular frame. Use wood screws to join the pieces together. Make sure everything is square. A carpenter's square is your best friend here. It's like a little angle-detecting superhero.
For added strength, especially if you're building a wider gate, consider adding diagonal bracing. This is usually a piece of wood running from one corner of the frame to the opposite corner. It stops the gate from sagging over time. Nobody wants a sad, droopy gate. It’s like a deflated balloon for your driveway. You can also add horizontal or vertical slats depending on your design. Space them out evenly, or do something funky. It’s your gate, your rules!
Once your gate panel is assembled, you'll want to attach the hardware. First, the hinges. These usually attach to the posts and the side of the gate panel. Make sure they're positioned correctly so the gate swings smoothly. You might need to inset the hinges slightly into the wood for a cleaner look. Then, the latch! Decide where you want your latch to be. Usually, it's on the opposite side of the hinges. Make sure it aligns with a post or a sturdy part of the gate structure.
Before you permanently attach everything, do a dry fit. That's where you temporarily hold the gate in place to see how it swings, where the latch lands, and if everything looks good. This is your chance to make any adjustments before you start drilling permanent holes and driving screws. It's like a dress rehearsal for your gate. "How do I look? Is this my good side?"
Once you're happy with the dry fit, it's time for the permanent installation. Attach the hinges to the posts and the gate. Then attach the latch. You might need to do a bit of fine-tuning to ensure it operates smoothly. Sometimes, the wood might be a tiny bit warped, or the ground might be a smidgen uneven. That's where shims come in handy. Little slivers of wood to make everything perfect. Magic!
Now, for the finishing touches! Sanding. Oh, the sanding. It's not the most glamorous part, is it? But it's crucial for a smooth, professional finish. Start with a coarser grit sandpaper and work your way up to a finer grit. You want that wood to feel like a baby's bottom. Smooth and inviting. Or, you know, just not splintery. Splinters are the enemy. The sworn enemy of gates everywhere.
And then, the protection! This is where you make your gate look amazing and, more importantly, protect it from the elements. You can stain it, paint it, or seal it. Staining can highlight the natural beauty of the wood. Painting offers a completely different look and can hide imperfections. A good quality exterior sealer will help prevent water damage and UV rays from messing with your hard work. Think of it as sunscreen for your gate. Very important!
Let’s talk about the process of applying the finish. Follow the instructions on your chosen product. Most stains and paints will require two coats for best results. Make sure you let each coat dry completely before applying the next. Don't rush this! A little patience now means a gate that lasts for years to come. And nobody wants a flaky, peeling gate. It’s like wearing a ripped, stained shirt to a fancy party. Not the look you're going for.
What about automation? Some people like to go all out, right? Electric openers, remote controls. If that’s your jam, now’s the time to plan for it. You’ll need to consider how the opener will attach to your gate and post, and where the power source will be. It’s a whole other level of awesome, but also a whole other level of complexity. Maybe start with a manual gate and see how you feel. You can always upgrade later!
Let's not forget about gate stops. These are important little things that prevent your gate from swinging too far and damaging itself or anything nearby. They can be simple pieces of wood or metal attached to the ground. You don't want your gate to go on a runaway adventure, do you? They're like little guardians, saying "Whoa there, partner! That's far enough!"
And what if you have a sloped driveway? This can be a bit trickier, but totally doable. You'll need to account for the slope when you design and build your gate. You might need to adjust the height of the gate on one side compared to the other, or use a special type of hinge that allows for the angle. It's all about finding creative solutions! Think of yourself as a driveway architect, conquering the slopes.
So, to recap, we’ve talked about planning (the biggie!), design (get creative!), materials (choose wisely!), hardware (don't skimp!), posts (the foundation!), the gate panel (the star of the show!), bracing (for strength!), dry fitting (the practice run!), installation (the main event!), sanding (smooth operator!), and finishing (lookin' good!). Phew! That's a lot!
Building a wooden driveway gate is a fantastic project. It adds security, enhances curb appeal, and gives you that incredible feeling of accomplishment. Plus, you can tell everyone, "Yep, I built that bad boy myself!" High fives all around. Don't be afraid to ask for help if you need it, watch some YouTube videos (they're a goldmine!), and most importantly, have fun with it. It’s your gate, your kingdom’s entrance! Go forth and build!