How Do You Screenshot On A Lenovo Ideapad

Ever wanted to capture a hilarious meme, a mind-blowing discovery, or just a moment of pure digital magic from your Lenovo IdeaPad? Well, get ready for some super-duper easy fun! Taking a screenshot on your trusty IdeaPad is like having a digital camera for your screen, but way cooler because it's instant and captures exactly what you're seeing.
It’s like bottling lightning, but instead of lightning, it's pixels! You can grab a screenshot of anything, from a funny conversation to an amazing game level. Think of it as your personal little time capsule for your digital world.
The most common and arguably the most magical way involves a special handshake with your keyboard. It’s a simple little trick, a secret code that unlocks the screenshotting superpower!

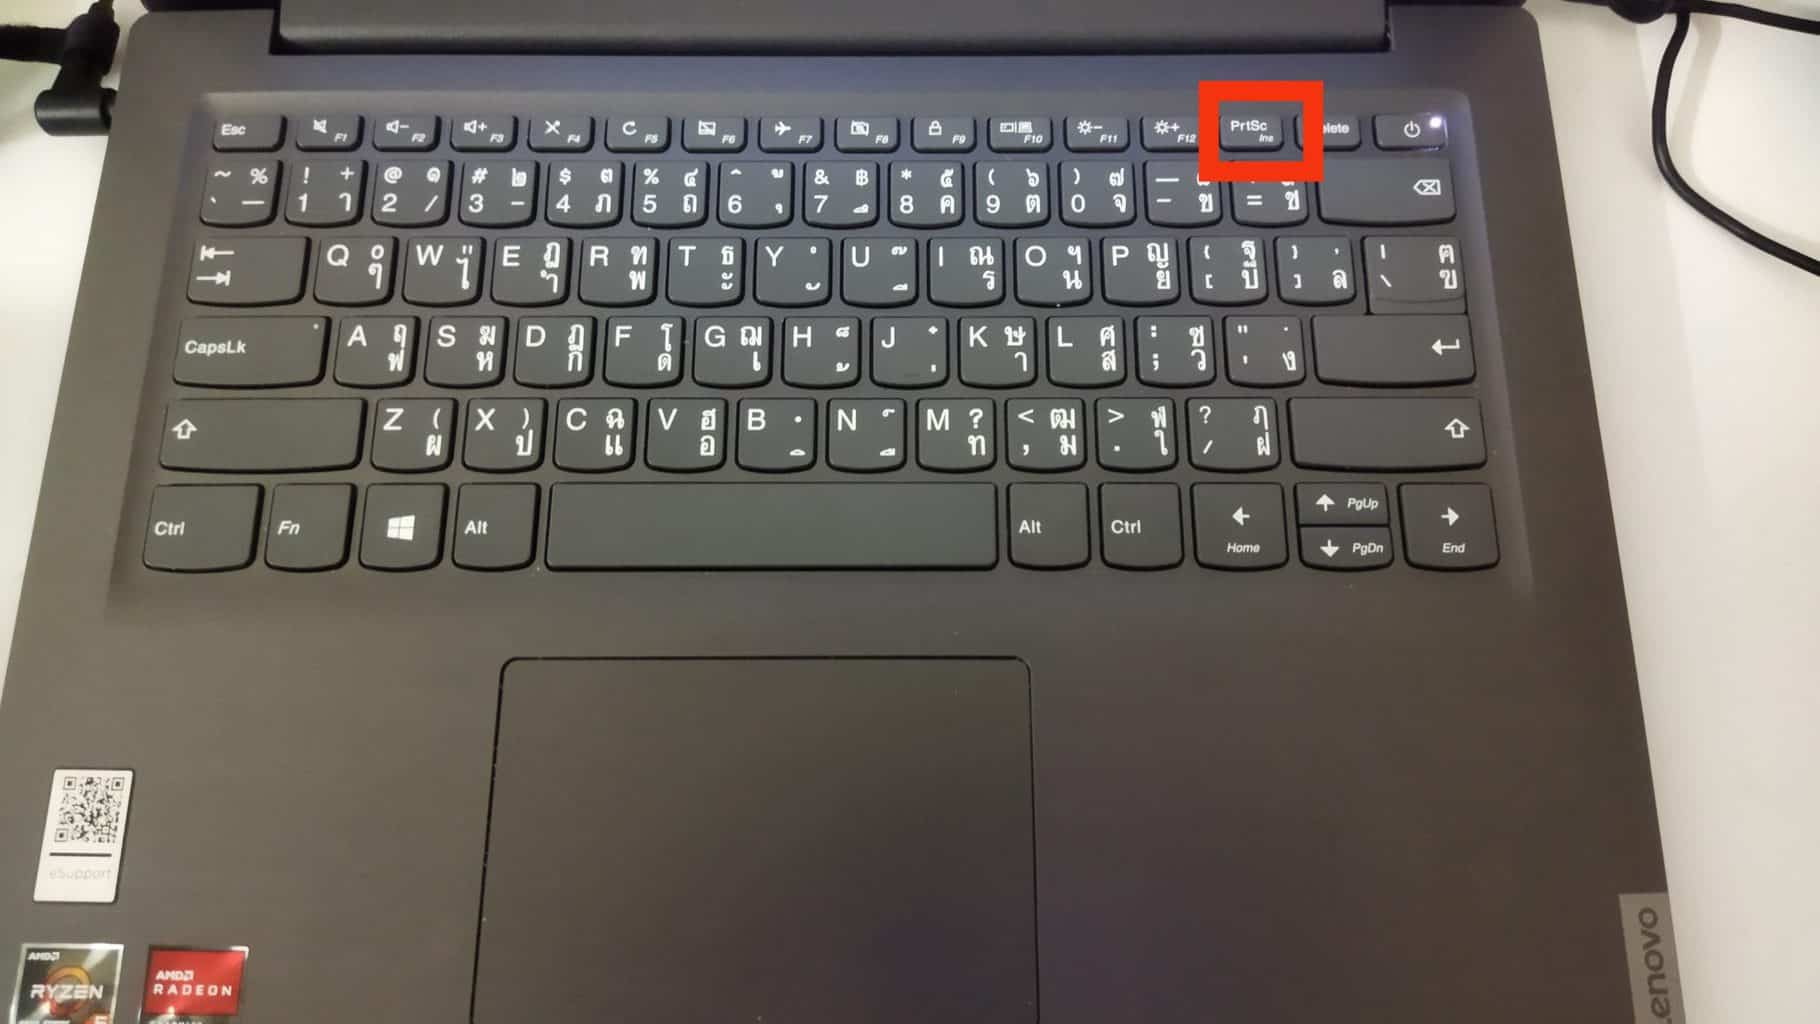
Here's the main star of the show: the Print Screen key. It’s usually found lurking somewhere in the top row of your keyboard. Sometimes it’s labeled as “PrtSc” or even “Prnt Scrn”. Don't worry if it's a bit shorthand; it still performs the same wondrous feat!
When you press this key, it’s like taking a snapshot of your entire screen. Imagine your whole computer display frozen in time, just for you to admire. It’s pretty neat, right?
But where does this magical snapshot go, you ask? Ah, that’s part of the adventure! It doesn't just float away into the digital ether.
Your screenshot is cleverly copied to your computer’s clipboard. Think of the clipboard as a temporary holding spot for digital goodies. It’s like a little invisible notepad that remembers what you just captured.
To actually see your treasure, you need to paste it somewhere. The easiest and most common place to paste your screenshot is into a program like Paint or Word. It's super simple!
Just open up Paint, which you can find by searching for it in your Start menu. Then, press Ctrl + V (that’s another keyboard magic spell!) and voilà! Your entire screen appears, a perfect replica of what you saw.
If you're feeling more wordy, you can do the same in a document. Open up your favorite word processor, place your cursor where you want your screenshot to appear, and hit Ctrl + V. Bam! Instant visual evidence.
But wait, there's more! This is where the true fun begins. What if you don't want the entire screen? What if you only want a tiny, precious piece of it?
That’s where a slightly different combination of keys comes in, and it’s just as delightful. It’s like picking out the best part of a delicious cake!
For this, you’ll need to involve the Windows key. This is usually the key with the little four-pane window symbol on it. It’s your gateway to many cool Windows features.
So, you’ll press and hold the Windows key, and while you’re holding it down, you’ll also press the Print Screen key. Try saying it out loud: “Windows key and Print Screen key!” It sounds like a secret incantation, doesn't it?
When you do this on your Lenovo IdeaPad, something truly wonderful happens. Instead of just copying to the clipboard, the screenshot is automatically saved as a file!
Yes, you heard that right! A whole image file, ready for you to admire, edit, or share. It’s like your computer magically conjured a picture just for you.
These glorious saved screenshots find their way into a special folder, a digital treasure chest, if you will. This folder is aptly named “Screenshots” and it lives inside your “Pictures” folder.
So, if you press Windows key + Print Screen, a few seconds later, your screen might briefly dim or flash. This is your computer’s way of saying, “Got it! Saved!” Don't be alarmed; it's just part of the magic show.
Then, you can navigate to your Pictures folder, open the Screenshots subfolder, and there it will be! Your captured moment, waiting patiently for you.
This method is fantastic for saving entire webpages, complex program interfaces, or anything you want to keep a permanent record of without the hassle of pasting.
But the fun doesn't stop there! There's another level of screenshotting wizardry for those who like to be precise and artistic.
This involves something called the Snipping Tool, or on newer versions of Windows, the Snip & Sketch tool. These are like digital scissors for your screen!
To summon the Snipping Tool, you usually just type “Snipping Tool” into your Windows search bar. It's a simple search, and the tool itself is incredibly intuitive.
Once it’s open, you’ll see a small window with a few options. The most exciting one is the “New” button.
Clicking “New” will allow you to select what part of your screen you want to capture. You can choose a Free-form Snip, which is like drawing a shape around what you want. Or you can pick a Rectangular Snip, where you just drag a box.
There’s also a Window Snip, which lets you click on a specific window to capture just that. And for the ultimate precision, there’s a Full-screen Snip. It’s like having a tailor-made screenshot every time!
The Snip & Sketch tool offers a similar, even more modern experience. You can activate it by pressing Windows key + Shift + S. This is a fantastic shortcut!
When you use Windows key + Shift + S, your screen will dim, and a small toolbar will appear at the top. You can then select your desired snip shape – rectangular, freeform, window, or full screen.
Once you’ve made your selection, the snippet is automatically copied to your clipboard, ready for you to paste. But what makes Snip & Sketch even more special is that it also gives you a notification to edit and save your snip!
Clicking on that notification opens up the Snip & Sketch editor. Here, you can draw on your screenshot, highlight important bits, or even crop it further. It's like having a mini photo editor built right in!
Imagine capturing a funny reaction face in a video call and immediately being able to draw a silly mustache on it. The possibilities for amusement are endless!
These tools are perfect for tutorials, sharing specific parts of an app, or just for creating funny annotated images to send to your friends. It's all about making your digital life more visual and more fun.
So, whether you're a seasoned pro or just dipping your toes into the world of screenshotting on your Lenovo IdeaPad, remember these simple tricks. They're your keys to unlocking a world of instant visual memories and shareable moments.
Don't be afraid to experiment! Try out the different key combinations and the dedicated tools. You might be surprised at how much fun you can have with just a few key presses.
The Print Screen key, the magical duo of Windows key + Print Screen, and the versatile Snipping Tool or Snip & Sketch are all at your fingertips. Go forth and screenshot your heart out!