Can You Dry Herbs In The Oven
So, you've been tending to your herb garden with a touch of green-thumb magic, and now you're swimming in a delightful abundance of basil, rosemary, thyme, and mint. Or perhaps you just snagged a fantastic bunch of fresh herbs from the farmer's market, dreaming of all the culinary adventures to come. But before those fragrant leaves can find their way into your evening stir-fry or weekend roast, there's a crucial step: drying them. And if you're anything like me, your eyes might have darted towards your oven, that trusty kitchen workhorse, and whispered, "Hey, can you do this too?"
The answer, my friend, is a resounding YES, you absolutely can dry herbs in the oven. It's like discovering a secret superpower for your kitchen appliances! While air-drying is the traditional, almost poetic method, let's be real: life moves fast. Sometimes we need a little expediency without sacrificing that wonderful, concentrated herb flavor. The oven offers a quicker, more controlled environment, and it’s surprisingly simple.
The Oven Method: A Gentle Warm-Up Act
Think of your oven not as a fiery inferno, but as a low-and-slow kind of place when it comes to drying herbs. We're not baking cookies here; we're coaxing out moisture. The goal is to evaporate the water content without cooking or burning the delicate leaves. This is key to preserving their essential oils, which are the heart and soul of their aroma and taste.

The magic temperature? Typically, we're looking at the lowest setting your oven can manage, often around 170-180°F (77-82°C). If your oven goes even lower, even better! Some ovens have a dedicated "warm" or "dehydrate" setting, which is your golden ticket. If yours doesn't, don't fret. You can often achieve a similar effect by setting it to the lowest temperature and then propping the oven door open a crack with a wooden spoon or a folded dishtowel. This allows moisture to escape, preventing the oven from getting too hot and steamy.
Prep Work: Getting Your Herbs Ready for Their Close-Up
Before we even think about the oven, there's a little prep to be done. First, wash your herbs gently. Even if they look clean, a quick rinse under cool water will remove any dust, dirt, or tiny garden critters. Pat them thoroughly dry with paper towels or a clean kitchen towel. Excess moisture is the enemy of efficient drying, and we want to get rid of it as much as possible upfront.
Next, remove any thick stems that aren't contributing much to the leafy goodness. You can leave a few woody stems on herbs like rosemary or thyme if you like, as they can help hold the leaves together. For softer herbs like basil or mint, strip the leaves from the stems. You can then either leave the leaves whole or give them a rough chop, depending on how you plan to use them later. Smaller pieces will dry faster, which can be a plus if you’re in a hurry.
The Drying Process: A Patient Wait (Not Too Long!)
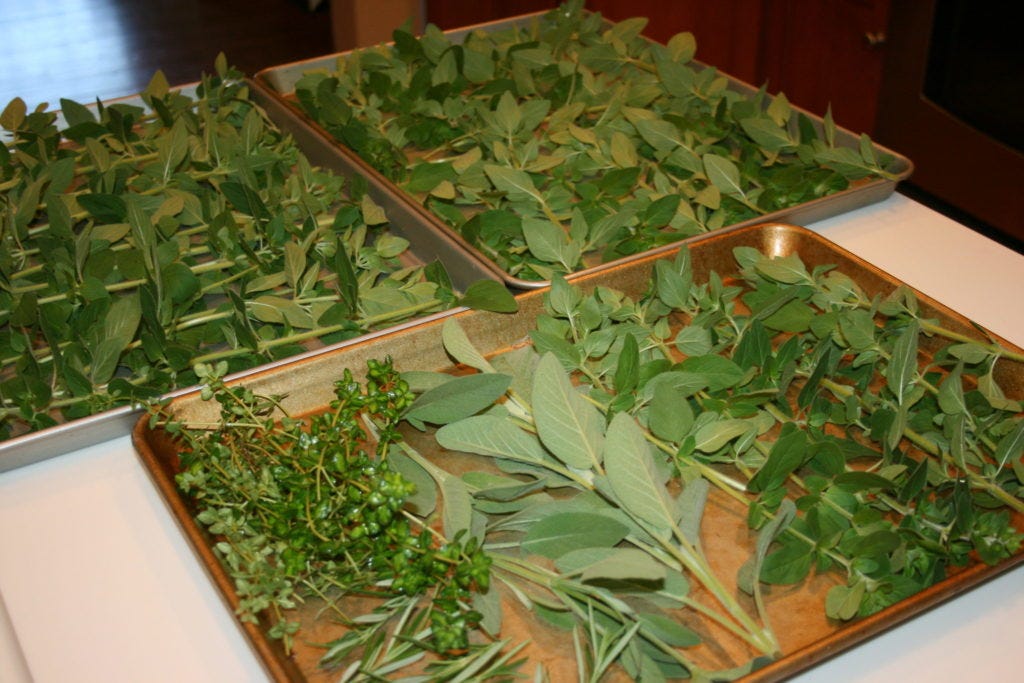
Now for the main event. You’ll need a couple of baking sheets. Line them with parchment paper for easy cleanup – because who has time for scrubbing stubborn herb residue? Spread your prepared herbs in a single layer on the baking sheets. Avoid overcrowding them! If they’re piled on top of each other, they'll steam rather than dry, and you’ll end up with a soggy mess instead of delightful dried herbs. Think of it as giving each herb leaf its own personal space to bask in the gentle oven warmth.
Pop those trays into your preheated oven. The drying time will vary depending on the type of herb, the thickness of the leaves, and how humid your kitchen is. As a general guideline, expect anywhere from 1 to 4 hours. For more delicate herbs like basil and mint, it might be on the shorter end. Heartier herbs like rosemary and thyme might need a bit longer.
The crucial part here is checking them regularly. Every 30 minutes to an hour, take the trays out and gently turn or stir the herbs. You’re looking for them to be brittle and crumbly. They should feel dry to the touch and easily crumble between your fingers. If they still feel pliable or leathery, they need more time. If you start to see any browning or crisping around the edges, your oven might be a little too hot, or they're done!
It’s a delicate dance, but you'll get the hang of it. Think of it like giving your herbs a mini spa treatment. They emerge refreshed, fragrant, and ready for their next act.
A Little Something Extra: When Low Heat Isn't Low Enough
What if your oven’s lowest setting is still a bit too toasty? Don’t despair! This is where the oven door trick comes in handy. As mentioned, propping the door open a crack is your best friend. It allows the heat and moisture to escape, creating a much gentler drying environment. You’ll be surprised at how effective this simple step can be.
Another tip: rotate your baking sheets if you’re using more than one. This ensures even drying, as ovens can sometimes have hot spots. You want all your precious herbs to get that consistent, gentle treatment.
Cooling and Storing: Preserving the Sunshine
Once your herbs are perfectly brittle and fragrant, remove them from the oven and let them cool completely on the baking sheets. This cooling process continues the drying, and it’s important to make sure they’re bone dry before you store them. If you try to store them while they’re still even slightly warm, condensation can form, leading to mold – and that’s a culinary catastrophe we want to avoid.
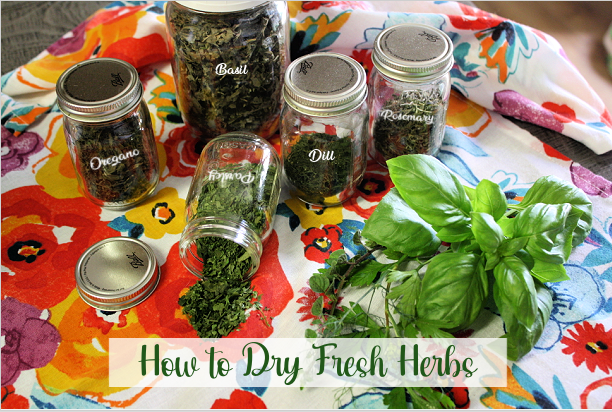
When they’re cool, it’s time to store them. For maximum flavor and longevity, you’ll want airtight containers. Small glass jars with tight-fitting lids are ideal. You can also use resealable plastic bags, but glass is generally preferred for better protection against moisture and odors.
You can store them whole, or you can crumble them between your fingers or give them a quick pulse in a spice grinder just before storing. Some people like to add a tiny silica gel packet to their jars to absorb any residual moisture, but if your herbs are thoroughly dried, this usually isn't necessary.
Store your dried herbs in a cool, dark place, away from direct sunlight and heat. A pantry or cupboard is perfect. Properly dried and stored herbs can retain their flavor for 6 months to a year, sometimes even longer. The vibrant color might fade a bit over time, but the aroma and taste will be a delightful reminder of your summer garden, even in the depths of winter.
A Dash of Culture: Herbs Through the Ages
The practice of drying and preserving herbs isn't new, of course. For millennia, humans have relied on these fragrant plants for flavor, medicine, and preservation. Ancient Egyptians used herbs in embalming and medicinal preparations. The Romans and Greeks liberally seasoned their food and used herbs for their believed therapeutic properties. Think of the pungent aroma of dried oregano that still evokes images of sun-drenched Mediterranean villages or the comforting scent of dried sage that's a staple in many holiday feasts.
Drying herbs allowed communities to enjoy their benefits year-round, bridging the gap between harvests. It was a way of capturing the essence of summer and storing it for leaner times. So, when you’re reaching for that jar of dried thyme, you're not just adding flavor to your dish; you're connecting with a practice that’s as old as civilization itself.
Fun Fact Alert!
Did you know that the best time to harvest herbs for drying is usually in the morning, after the dew has evaporated but before the sun gets too hot? This is when their essential oils are most concentrated. So, if you're harvesting your own for drying, set that alarm!
Herbs to Try: Your Oven's New Best Friends
What herbs are particularly well-suited for oven drying? Pretty much all of them! But some common favorites include:
- Basil: Wonderful in Italian dishes. Oven-dried basil has a more concentrated, slightly sweeter flavor than fresh.
- Oregano: A must for pizzas and Mediterranean cuisine.
- Thyme: Versatile, great in roasts, soups, and stews. Its woody stems hold up well.
- Rosemary: Perfect for lamb, chicken, and roasted vegetables.
- Mint: Excellent for teas, desserts, and savory dishes.
- Sage: A classic for poultry and stuffing.
- Dill: Fantastic with fish and in pickles.
- Parsley: While it dries well, some say its flavor is best when fresh. However, oven-dried parsley is still a lovely addition to many dishes.
Don't be afraid to experiment! The beauty of oven drying is its speed and control, allowing you to preserve a wider variety of your garden's bounty.
A Gentle Reminder: Listen to Your Herbs
Ultimately, the best way to know if your herbs are dry is to trust your senses. They should feel light, be easily crushed, and have a strong, concentrated aroma. If they still have any give, they need more time. Over-drying can lead to a loss of flavor, so it's better to err on the side of slightly under-done and pop them back in for a bit longer than to scorch them into oblivion.
Beyond the Oven: A Quick Comparison
While the oven is fantastic for speed, it's worth remembering other methods. Air-drying, usually in a cool, dry, well-ventilated place, is the most traditional. Bunch your herbs and hang them upside down, or spread them on screens. This can take anywhere from a week to a month. Dehydrators are also excellent tools for a consistent, low-temperature dry, offering even more control. But for those spontaneous moments, or when you're short on space and time, the oven is your reliable companion.
So, the next time you're faced with a surplus of fresh herbs, don't let them wilt away. Embrace the convenience and effectiveness of your oven. It’s a simple technique that unlocks a world of concentrated flavor, allowing you to bottle up the essence of sunshine and summer to be enjoyed all year long.
It’s these small, mindful acts in the kitchen that truly transform the ordinary into something special. Taking a few hours to carefully dry herbs might seem like a small thing, but the reward – that burst of pure, unadulterated herb flavor in your cooking – is immense. It's a little bit of magic, powered by your oven, ready to elevate your everyday meals. And in a world that often feels rushed, finding joy in these simple, sustainable practices is a beautiful thing indeed. Happy drying!